
Post by Deleted on Jul 22, 2013 21:47:06 GMT 10
Well I did it so I guess I should tell how it all went together. The lightbar I have is Kuryakyn Constellation Driving Light Bar you also need a mounting bracket for this bar, for the VT400 it's the same as the VT750 Aero. It's also wise to wire it using a relay, the kit I used was the Kuryakyn Universal Driving Light Wiring Relay Kit with Handlebar Mounted Switch.
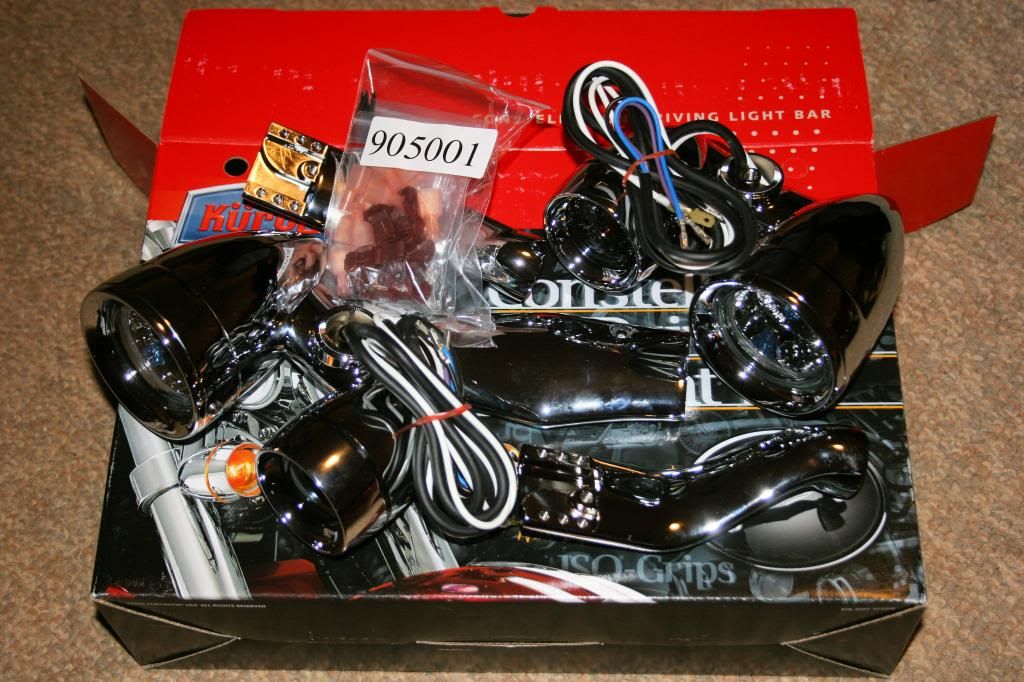
This is what it looked like when I got it and unpacked all the exciting boxes.
Yep lots of bits and wires. You have to assemble the bar before you can do anything so I sat down on the floor (at the risk of being licked to death by an excited Staffy) on Friday night and put it together. There's not a lot to do really but I would suggest if you have a child with small fingers handy then make full use of it to get the screw in to attach the lights to their respective bars.
You have to get the screw in behind where those wires are coming out, that's one of the fiddliest jobs I'd done so far. Once that is done you just screw on the bracket and then put on the mask.

Ready to put on the bike.
Next go to your bike and take off the original front blinkers. It took me ages to work out just which bolt was holding this on and took out a few different ones before I had it figured out.
It also holds on your headlight, so be careful when you take these out, just slip out the bracket for the indicators, then I popped the bolts back in to hold the headlight in place while I got the new one ready to install.
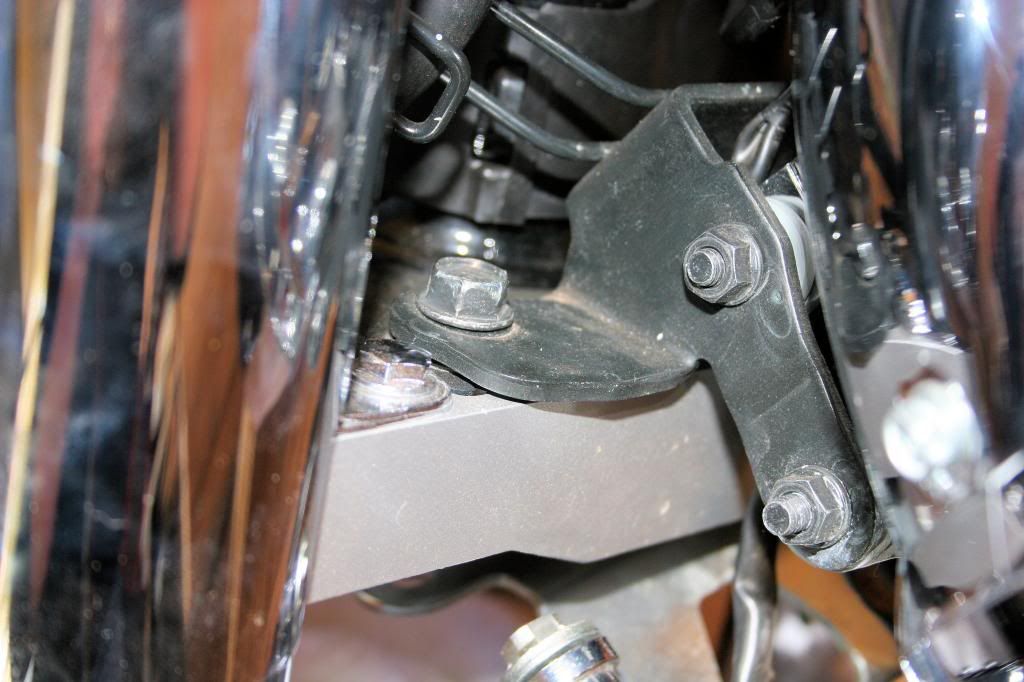
The Kuryakyn bracket comes with spacers that screw to the bottom part of your original bolts underneath the triple tree, then the bolts that come with the bracket go through the bracket and screw into bottom of the spacers. I used some locktight on all these bolts.
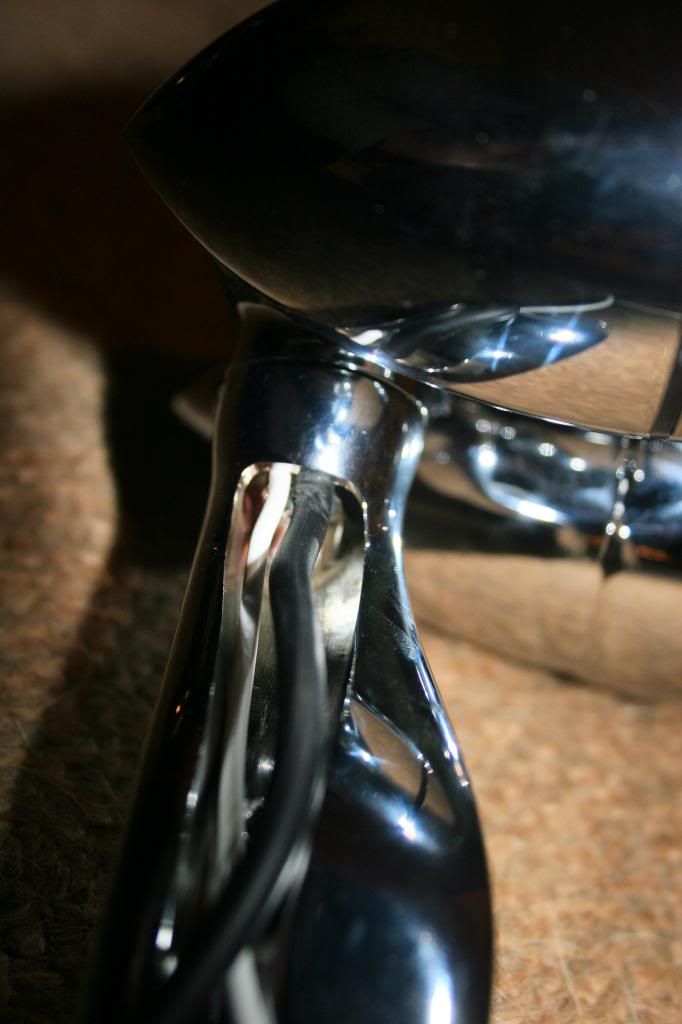
Now that it's all secure, I had to take apart the headlight for the second time in as many weeks (sheesh if I hadda realised that I woulda waited to put the HID kit in .. oh well), feed your wires though the headlight to wire up the indicators. This is what it looks like so far ..
That white wire hanging out there is the one for your headlight, ya dont wanna feed that through there cause it's gonna be wired seperatly through the relay and switch. Wired up the indicators using my own connectors (after a trip to Repco to buy some), the bar comes with connectors but they are some kind of T junction ones and the indicators are just straight end to end connections (I dont understand why they thought that you would need to do the T thing but anyways I did it my way )
)
Once you have both indicators wired up you can stick the headlight back together ... do I mention the swearing at the little screws that keep falling out while you are trying to do this !#@#$*&^
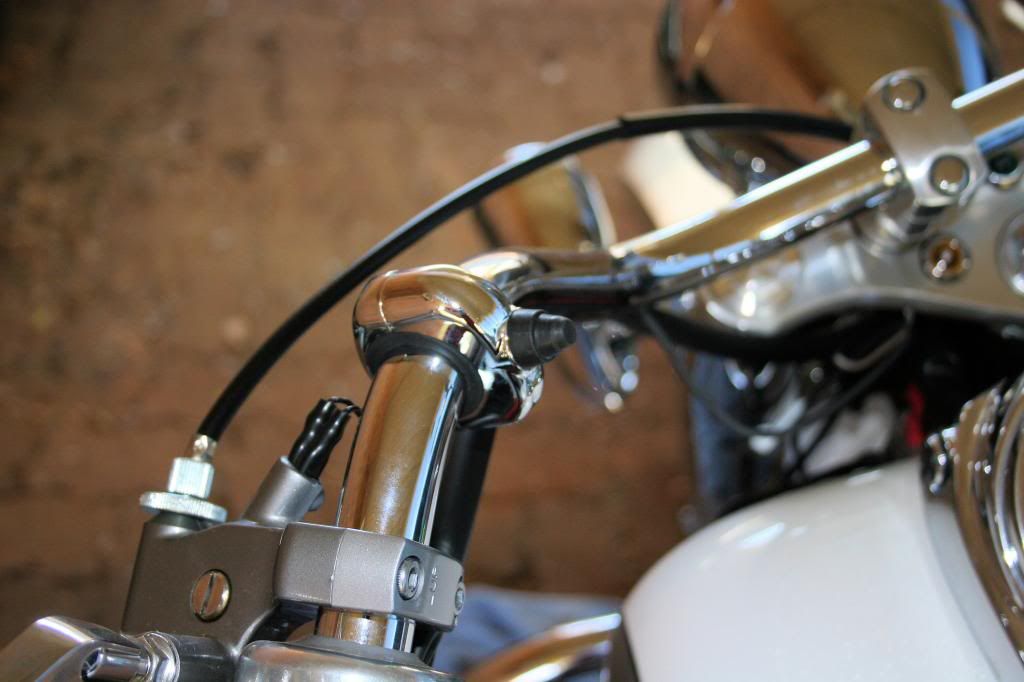
Next I put the new switch on my handle bar, it didn't fit tightly up against everything like I wanted it to because of the wires coming out there, but it's still reachable.
Then to the other end of the bike. The relay kit needs to be tucked somewhere close to the battery, I found a nice little spot just behind my fuse box and managed to screw it securely there.
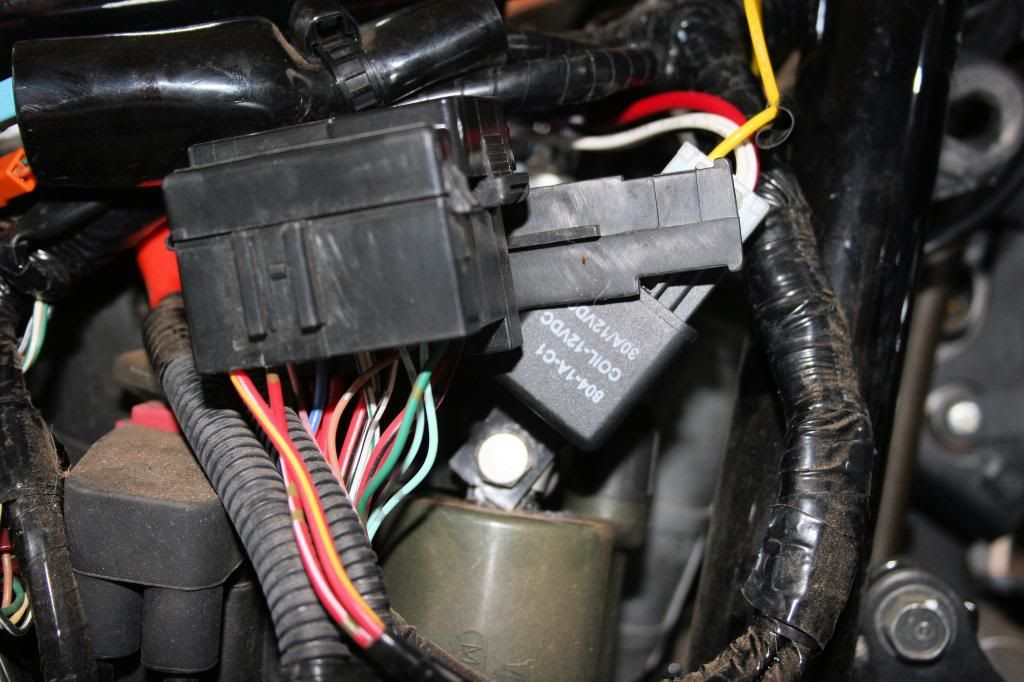
It's the black thing at the back with the red, white and yellow wires coming out of it. Next you are supposed to wire it to the battery, I left this til last cause I really didn't wanna risk playing with live wires. Then you need to attach one of the yellow wires to a wire on your bike, the instructions said to find one that only has power when your ignition is on, you can use a wiring guide to find this or a testing light. I didn't have either but to tell the truth because I have a switch I wasn't too concerned. It's a bit tight in there and most of the wires are wrapped in tight little bundles and you cant really get to them. Looking at the pic now I can see a bunch of wires coming from the fuse box, I'm just not sure if any of them would be usable. I'm still debating with myself that I did the right thing here, I just found a likely looking wire and used the T connector thingy on it.

When I unplugged it all my lights on my instrument panel as well as all the lights on my bike didn't work, so it seemed like a good idea at the time. Once I put power to it though the driving lights now work without the ignition on. I might invest in a testing light soon and find a different wire.
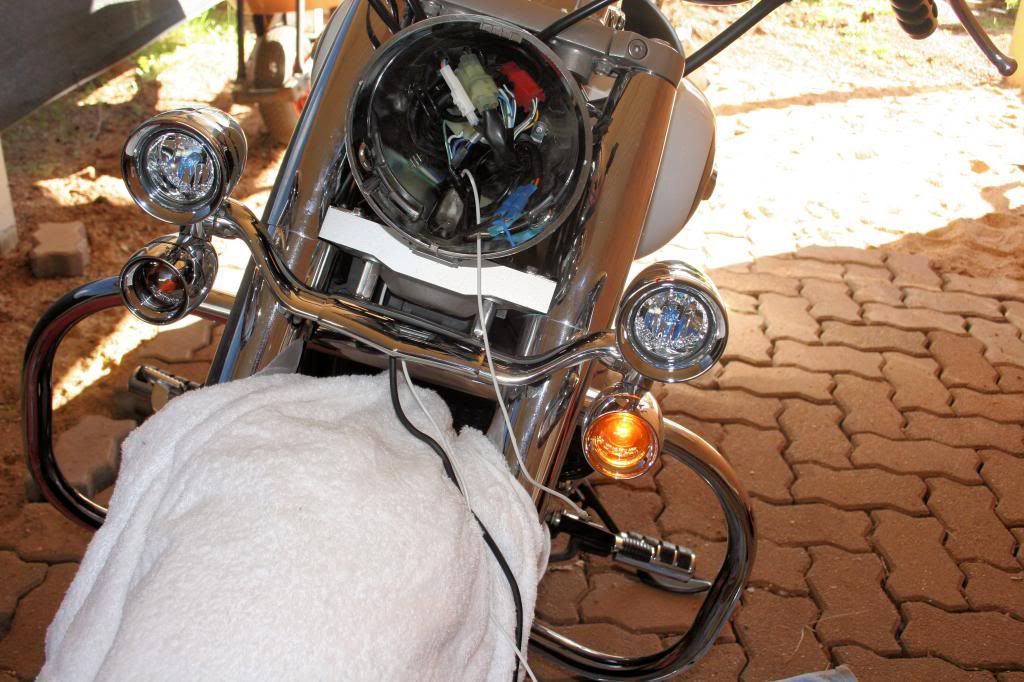
So that was the easy part, now I had 6 wires that needed to be at the front of the bike, and not touching any part of the engine. I needed to feed them up under the tank somehow. I got a feeling as dusk starting really settling in the it might have been easier to take off the tank to do this then I found ...

Yep that's wipper snipper cord. It's stiff enough to find a path under the tank but flexible enough to get through there too. I fed it down from the front of the bike alongside the bunch of wires that are already there. Now remember that kid with the tiny hands that you had for the screw earlier .. grab him again!! I needed to kind of guide things at times by shoving my hand up under the tank and pushing the cord over bits so that the wires wouldn't be resting on engine. I got it down there eventually and after attaching my wires to it I pulled the wires back through easily. It was almost full dark now and there's no light on this side of the house but I was so close now!
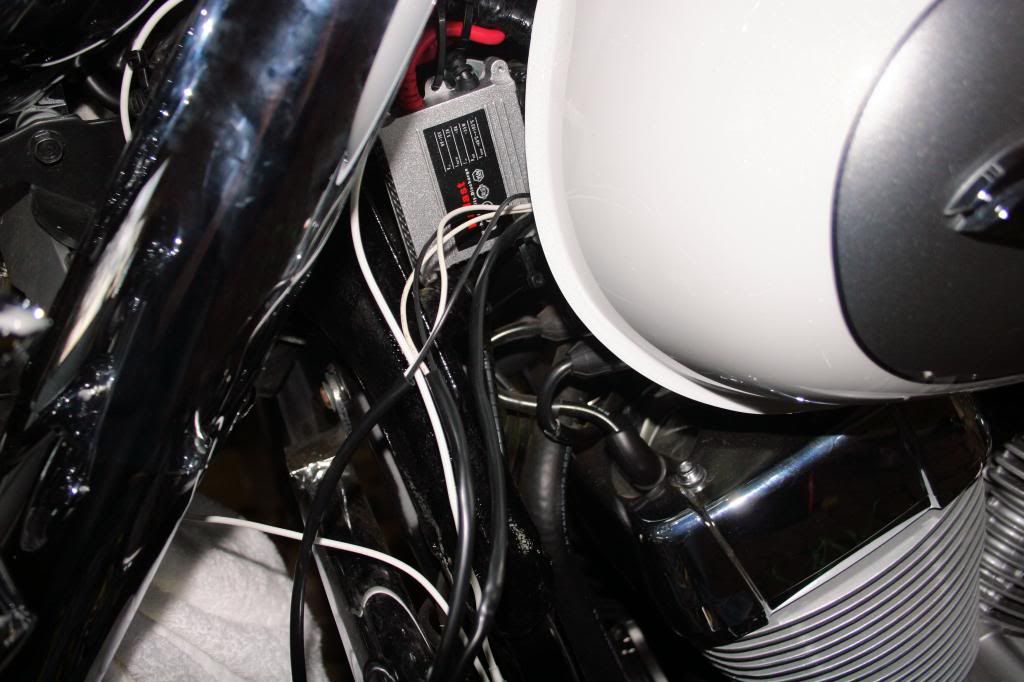
That's the wires in front of the ballast for the HID light. I slipped them up over a part of the frame up there so that they were further away from engine heat and anchored then in a few places with cable ties. Now it was just a case of shortening those wires and connecting the headlights and switch to their respective mates. By now I'd run out of light (torch was in play) and only had enough connectors for the headlight wires so I connected them up and and didn't shorten the ones to the switch so I could try it all out. I connected it to the battery and that's when I discovered that the wire I'd connected to on the bike was live all the time as the lights came straight on. The switch works though so that I could leave it like that for now. I put towels on exposed bits and went to bed ....
Then next morning saw me out of bed with enough time to tidy up a few things, like putting some black tape around the white wires coming out of the bar that stood out. I just haven't had time to get to Repco for more connectors for last couple of wires, which are still hanging til I can shorten them, but it all works.
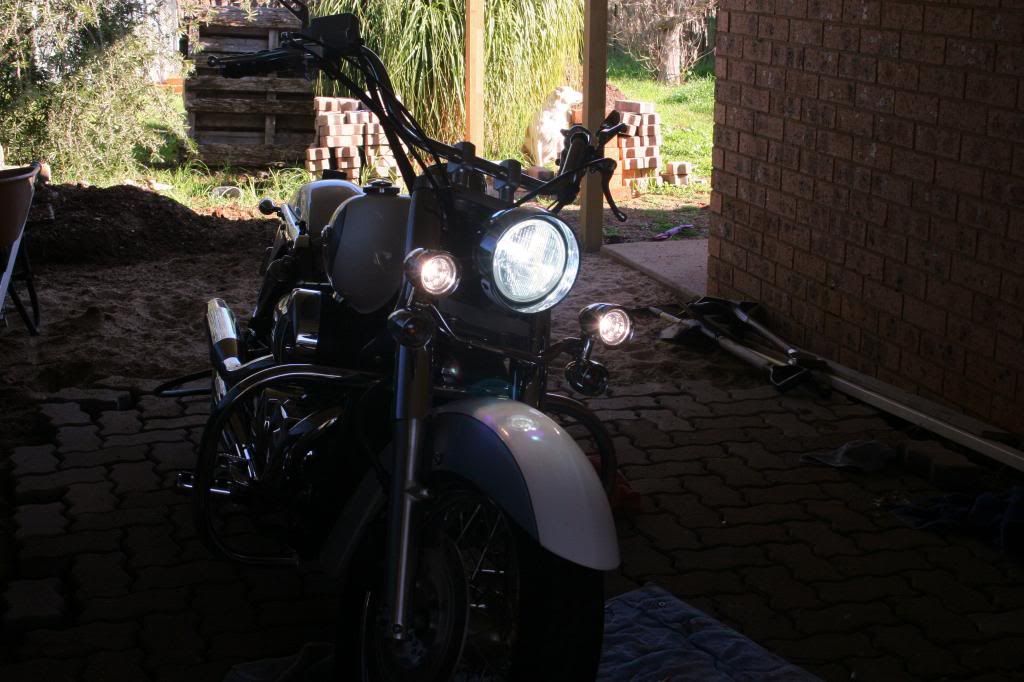
I think it looks pretty good, I'll post up some pics of the complete look soon as I can complete it. It's a fiddly job and I have to say I left some blood on my baby this weekend. Dunno if I need to have anything else that requires wiring .. next time I'm gonna go find a child with smaller hands!!
This is what it looked like when I got it and unpacked all the exciting boxes.
Yep lots of bits and wires. You have to assemble the bar before you can do anything so I sat down on the floor (at the risk of being licked to death by an excited Staffy) on Friday night and put it together. There's not a lot to do really but I would suggest if you have a child with small fingers handy then make full use of it to get the screw in to attach the lights to their respective bars.
You have to get the screw in behind where those wires are coming out, that's one of the fiddliest jobs I'd done so far. Once that is done you just screw on the bracket and then put on the mask.
Ready to put on the bike.
Next go to your bike and take off the original front blinkers. It took me ages to work out just which bolt was holding this on and took out a few different ones before I had it figured out.
It also holds on your headlight, so be careful when you take these out, just slip out the bracket for the indicators, then I popped the bolts back in to hold the headlight in place while I got the new one ready to install.
The Kuryakyn bracket comes with spacers that screw to the bottom part of your original bolts underneath the triple tree, then the bolts that come with the bracket go through the bracket and screw into bottom of the spacers. I used some locktight on all these bolts.
Now that it's all secure, I had to take apart the headlight for the second time in as many weeks (sheesh if I hadda realised that I woulda waited to put the HID kit in .. oh well), feed your wires though the headlight to wire up the indicators. This is what it looks like so far ..
That white wire hanging out there is the one for your headlight, ya dont wanna feed that through there cause it's gonna be wired seperatly through the relay and switch. Wired up the indicators using my own connectors (after a trip to Repco to buy some), the bar comes with connectors but they are some kind of T junction ones and the indicators are just straight end to end connections (I dont understand why they thought that you would need to do the T thing but anyways I did it my way
 )
) Once you have both indicators wired up you can stick the headlight back together ... do I mention the swearing at the little screws that keep falling out while you are trying to do this !#@#$*&^

Next I put the new switch on my handle bar, it didn't fit tightly up against everything like I wanted it to because of the wires coming out there, but it's still reachable.
Then to the other end of the bike. The relay kit needs to be tucked somewhere close to the battery, I found a nice little spot just behind my fuse box and managed to screw it securely there.
It's the black thing at the back with the red, white and yellow wires coming out of it. Next you are supposed to wire it to the battery, I left this til last cause I really didn't wanna risk playing with live wires. Then you need to attach one of the yellow wires to a wire on your bike, the instructions said to find one that only has power when your ignition is on, you can use a wiring guide to find this or a testing light. I didn't have either but to tell the truth because I have a switch I wasn't too concerned. It's a bit tight in there and most of the wires are wrapped in tight little bundles and you cant really get to them. Looking at the pic now I can see a bunch of wires coming from the fuse box, I'm just not sure if any of them would be usable. I'm still debating with myself that I did the right thing here, I just found a likely looking wire and used the T connector thingy on it.
When I unplugged it all my lights on my instrument panel as well as all the lights on my bike didn't work, so it seemed like a good idea at the time. Once I put power to it though the driving lights now work without the ignition on. I might invest in a testing light soon and find a different wire.
So that was the easy part, now I had 6 wires that needed to be at the front of the bike, and not touching any part of the engine. I needed to feed them up under the tank somehow. I got a feeling as dusk starting really settling in the it might have been easier to take off the tank to do this then I found ...
Yep that's wipper snipper cord. It's stiff enough to find a path under the tank but flexible enough to get through there too. I fed it down from the front of the bike alongside the bunch of wires that are already there. Now remember that kid with the tiny hands that you had for the screw earlier .. grab him again!! I needed to kind of guide things at times by shoving my hand up under the tank and pushing the cord over bits so that the wires wouldn't be resting on engine. I got it down there eventually and after attaching my wires to it I pulled the wires back through easily. It was almost full dark now and there's no light on this side of the house but I was so close now!
That's the wires in front of the ballast for the HID light. I slipped them up over a part of the frame up there so that they were further away from engine heat and anchored then in a few places with cable ties. Now it was just a case of shortening those wires and connecting the headlights and switch to their respective mates. By now I'd run out of light (torch was in play) and only had enough connectors for the headlight wires so I connected them up and and didn't shorten the ones to the switch so I could try it all out. I connected it to the battery and that's when I discovered that the wire I'd connected to on the bike was live all the time as the lights came straight on. The switch works though so that I could leave it like that for now. I put towels on exposed bits and went to bed ....
Then next morning saw me out of bed with enough time to tidy up a few things, like putting some black tape around the white wires coming out of the bar that stood out. I just haven't had time to get to Repco for more connectors for last couple of wires, which are still hanging til I can shorten them, but it all works.
I think it looks pretty good, I'll post up some pics of the complete look soon as I can complete it. It's a fiddly job and I have to say I left some blood on my baby this weekend. Dunno if I need to have anything else that requires wiring .. next time I'm gonna go find a child with smaller hands!!


 Top bloody effort if i say so myself. Great pictorial ,im sure it will serve well for another rider that is going to do it .
  ?? I would never say that to such a lovely lady George .
  I can tell you they light up my backyard pretty good
  E.D.I.T button,it,s a dream