Post by scrap on Aug 7, 2013 19:27:23 GMT 10
Changing Brake Fluid & fitting braided lines
--------------------------------------------------------------------------------
Installing front braided lines + changing brake fluid
The cruiser is about 350kg wet – so I‘m after every bit of braking performance I can muster so on go the braided brake lines.
Cover your all your paintwork – brake fluid will strip your paint on contact so be warned.
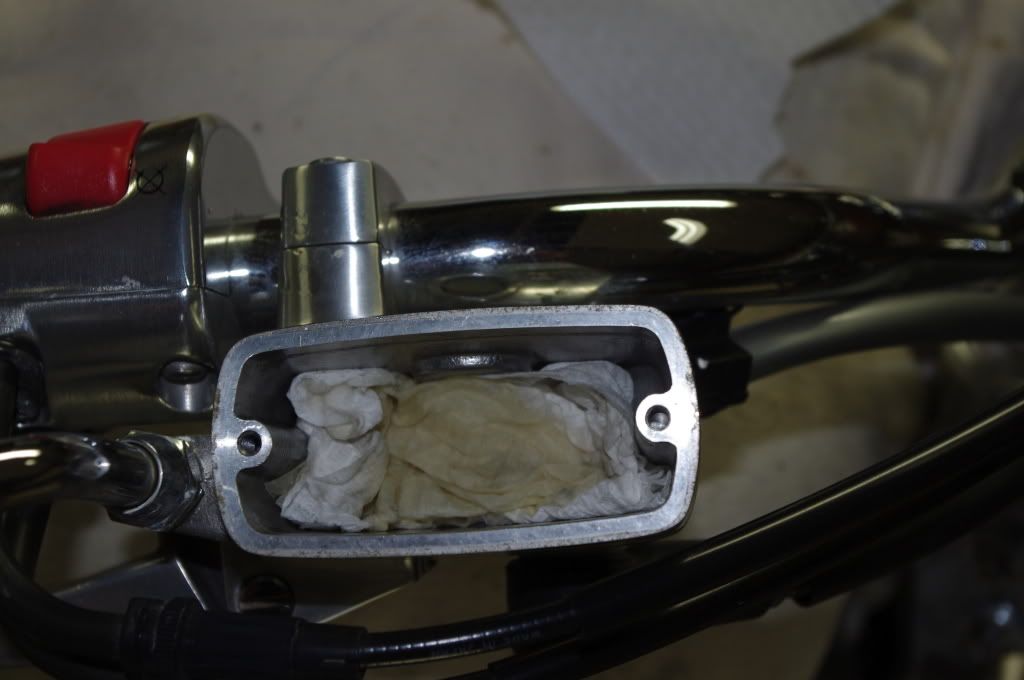
Uncap the brake fluid reservoir. Check the bottom of the chamber for debris. If there is debris, syringe out the brake fluid and clean up the debris.

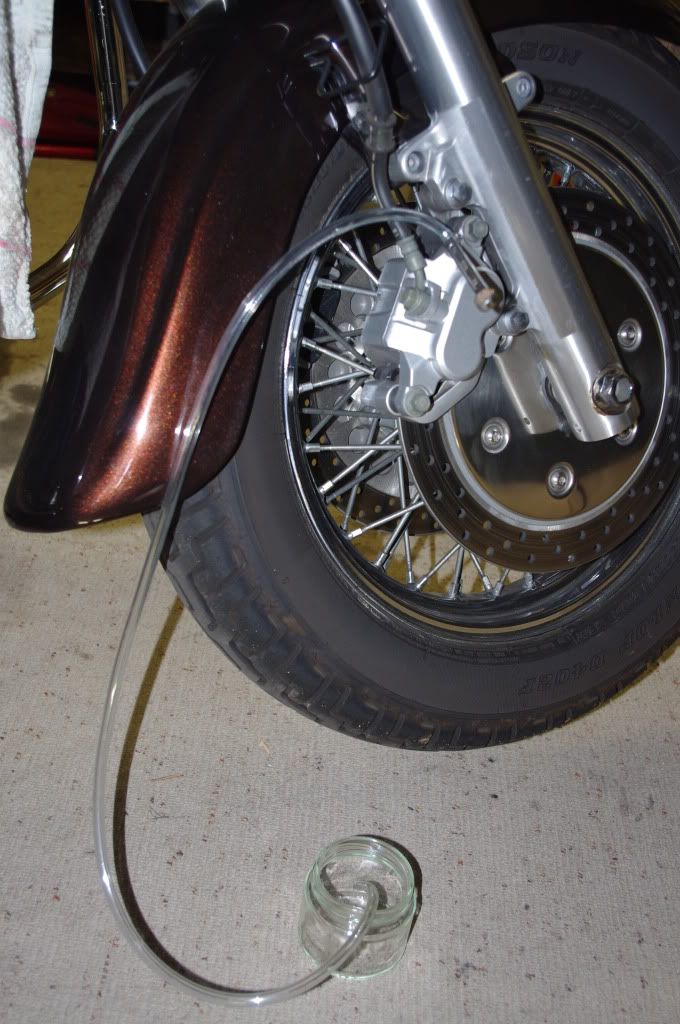
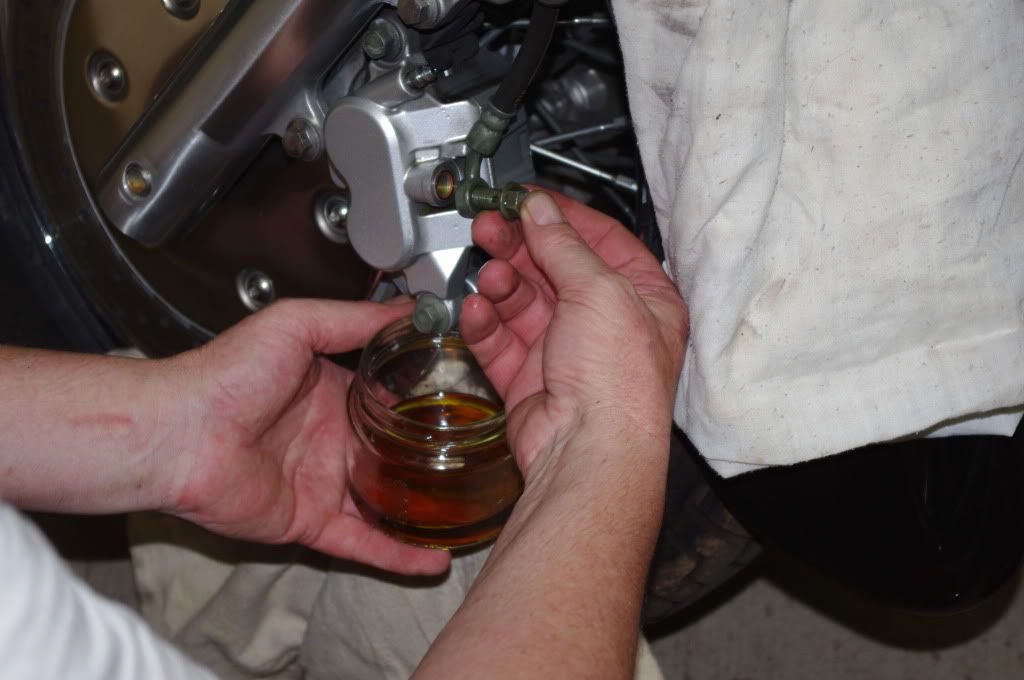
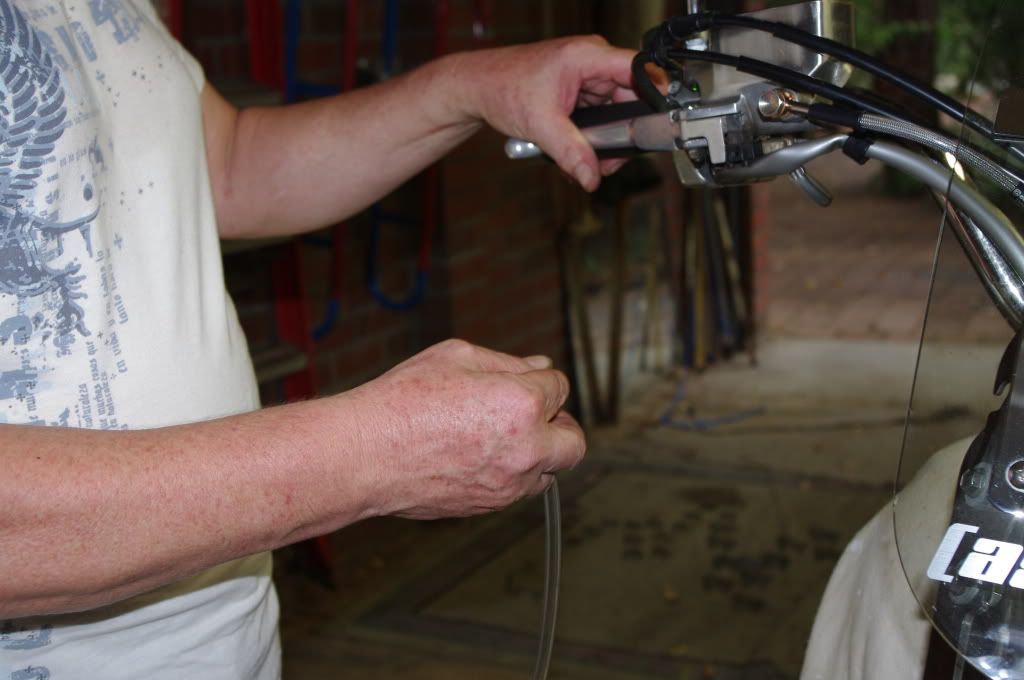
Open the bleeder valve on the caliper – my habit is to connect a clear 6mm plastic line to the nipple after just loosening the nipple and twist the plastic tube to open it further. Place the end in a jar and gently squeeze the brake handle if you haven’t had to empty it previously. This will eject the brake fluid from the line. I’ve got two callipers, so on the alternate side, its simply a matter of opening the bleeder, connecting the hose and let it drain by gravity.
Use a paper towel to mop any residual fluid in the reserve chamber.
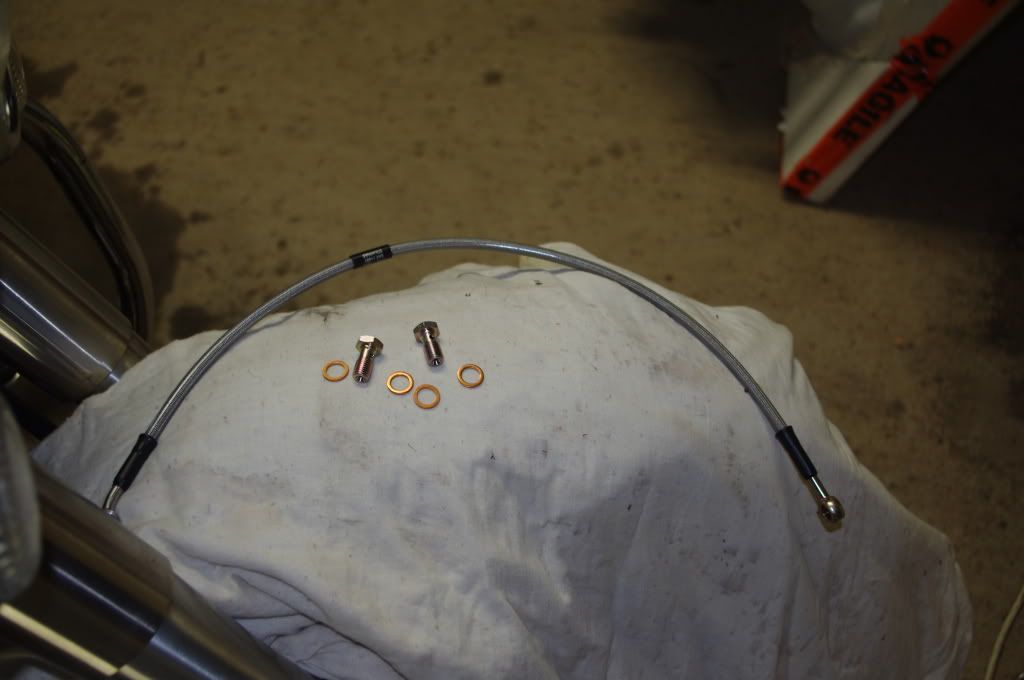
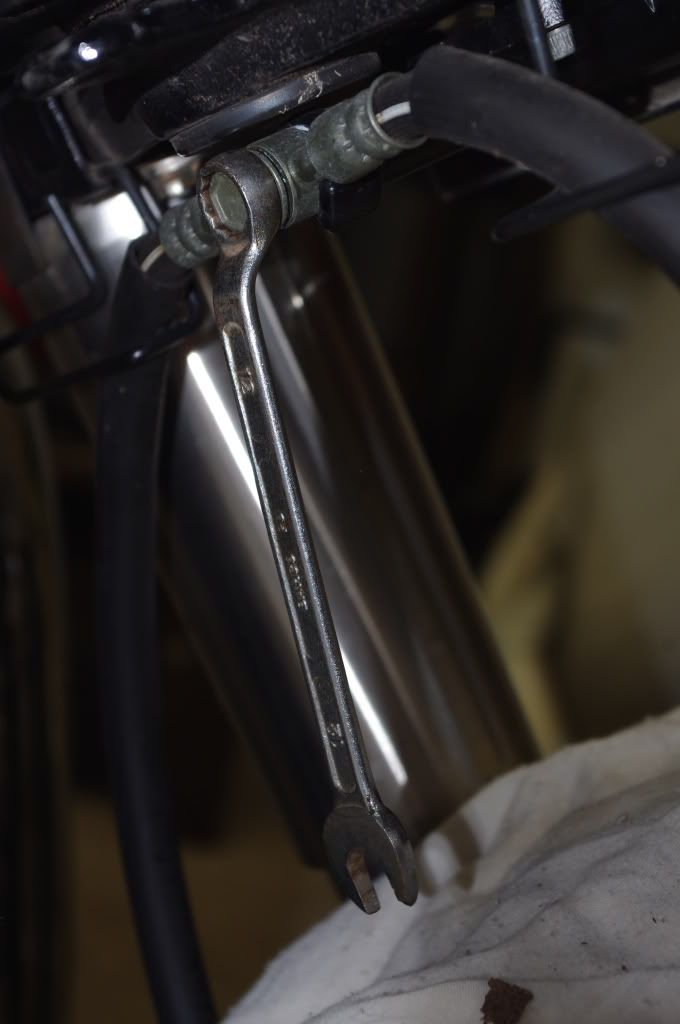
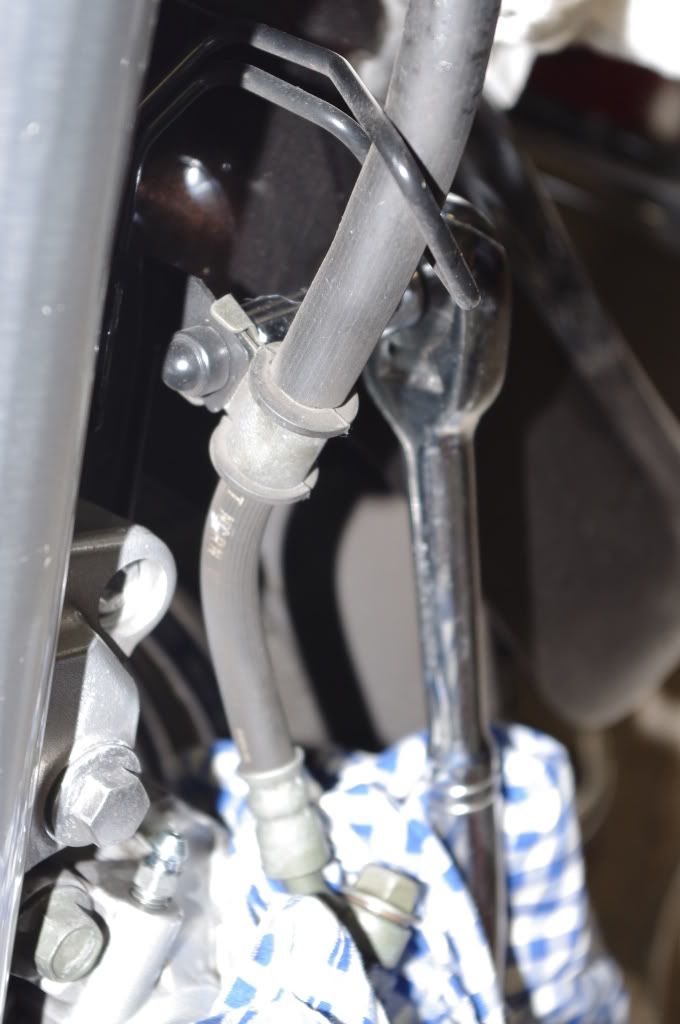
Undo the bolt at the bottom of the upper line (12mm) at the forks bar; wrap it in a cloth so it doesn’t drip. Undo the banjo bolt at the reserve chamber and remove the line pulling it upwards. Measure this line against your new braided line to ensure it’s the correct length. Check the banjo angles, they may be different at each end and make sure you put the new banjos at the correct end.
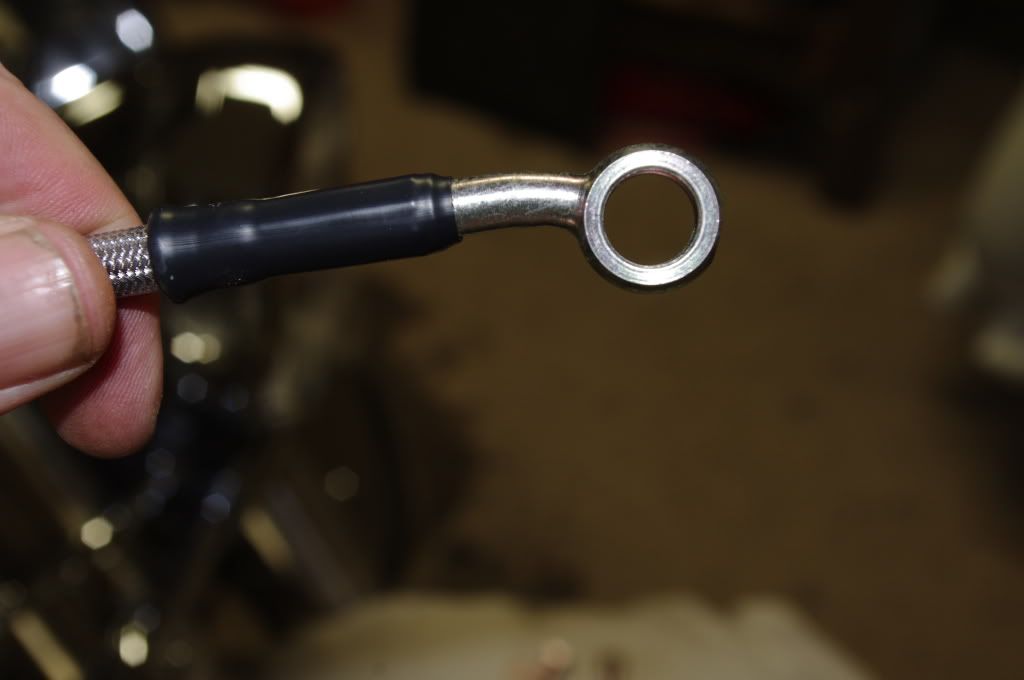
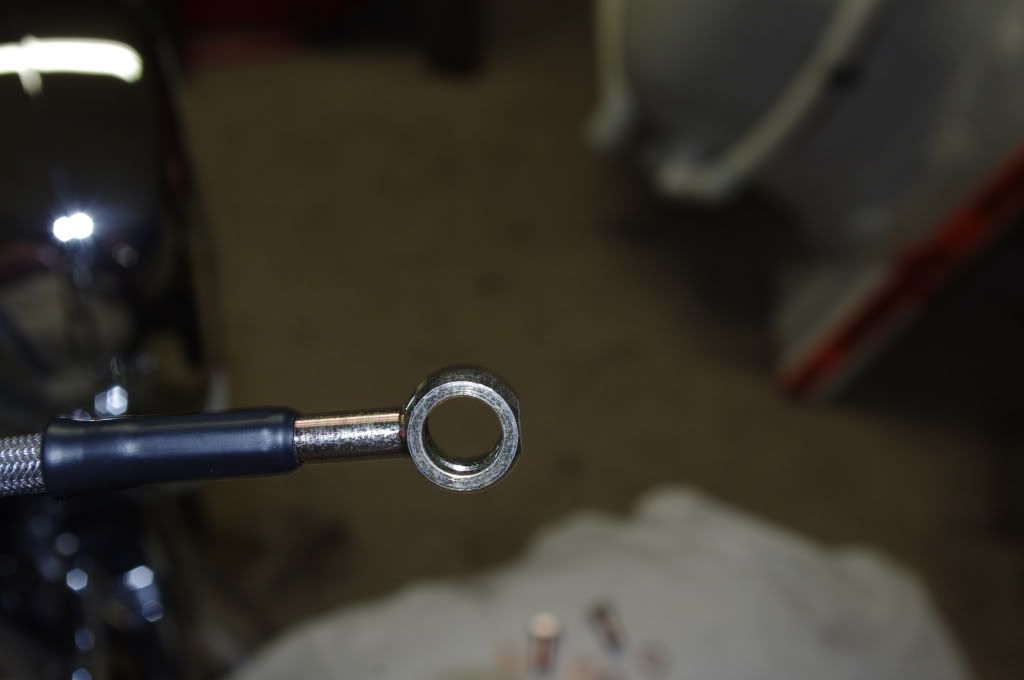
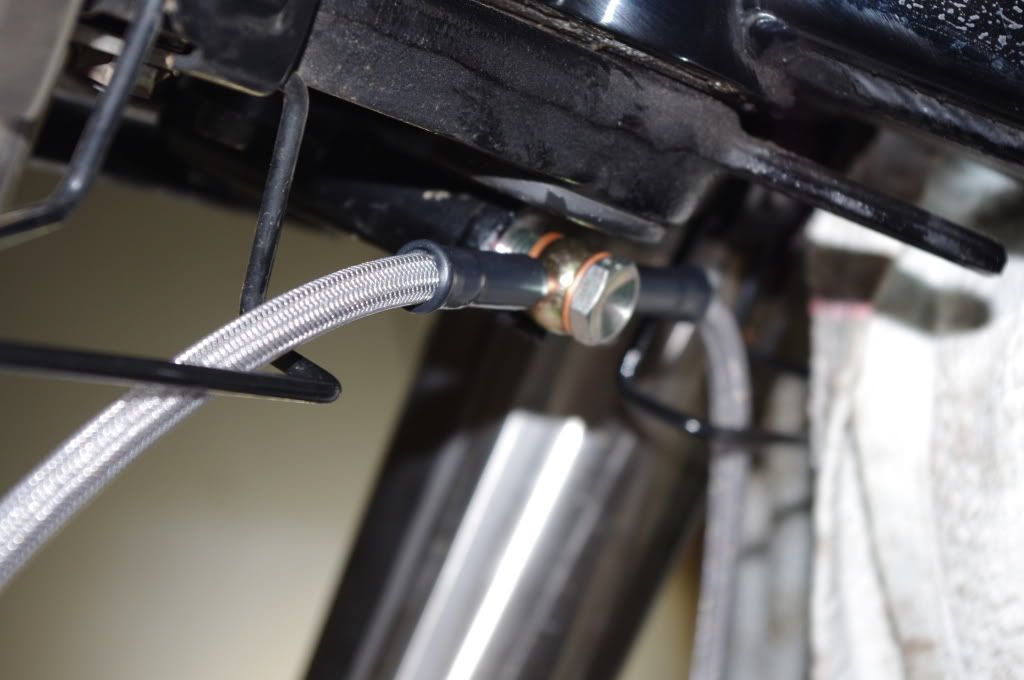
Feed the new line down, and screw in the new banjo bolt finger tight making sure that (1) the old copper washer has been removed and (2) there are new copper washers either side of the new banjo. Feed the top of the new line through any guides and finger tighten the bolt on to the reserve chamber (copper washers as before). The new bolts will be 14 mm. Tighten both bolts appropriately. You should be able to feel the copper washers “collapse”.
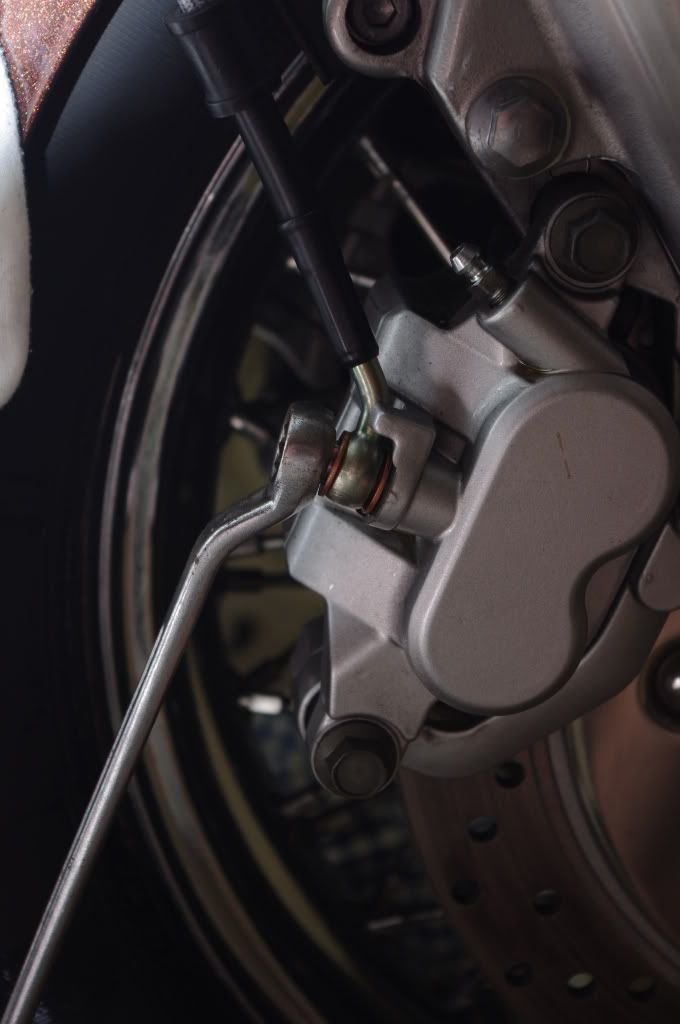
Undo the banjo bolt on one side at the caliper (12mm) and the brake line holding bracket (10mm); keeping your waste jar handy just in case there is trapped fluid in the line. Once clear, undo the banjo bolt on the fork bar and then on the banjo bolt on the alternate side (if you have double calipers). Measure length against your new line.
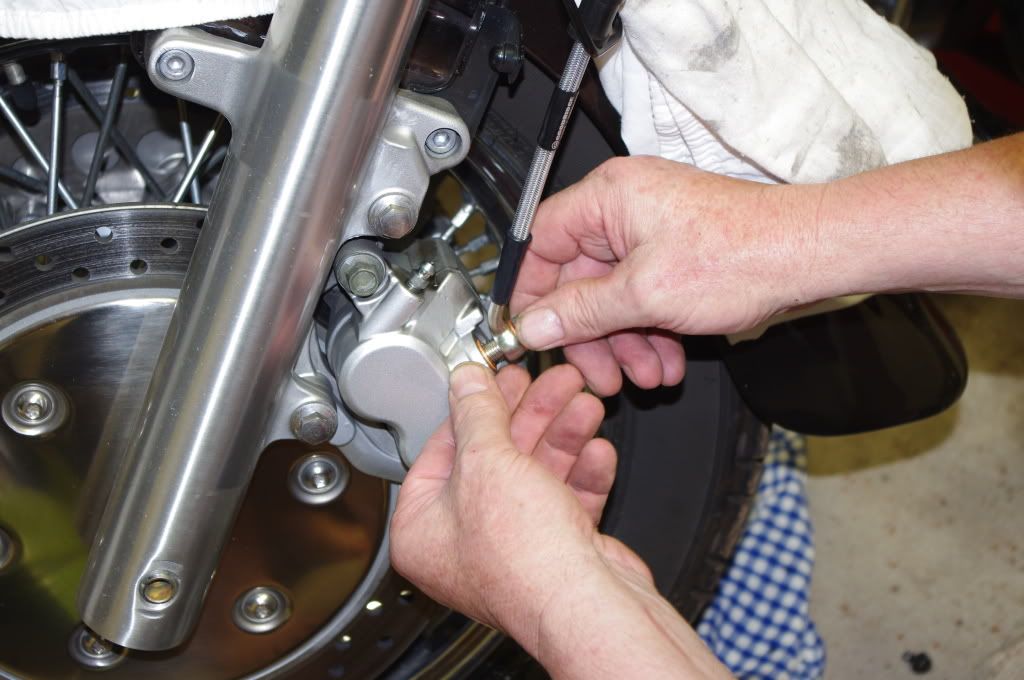
Install the new banjo and banjo bolt to the caliper (copper washers as above) finger tight. Feed though any guides that the previous line was fed through and connect to new banjo and banjo bolt to the bracket on the fork bar. Feed to opposite side and repeat if there are two calipers. Tighten as above.
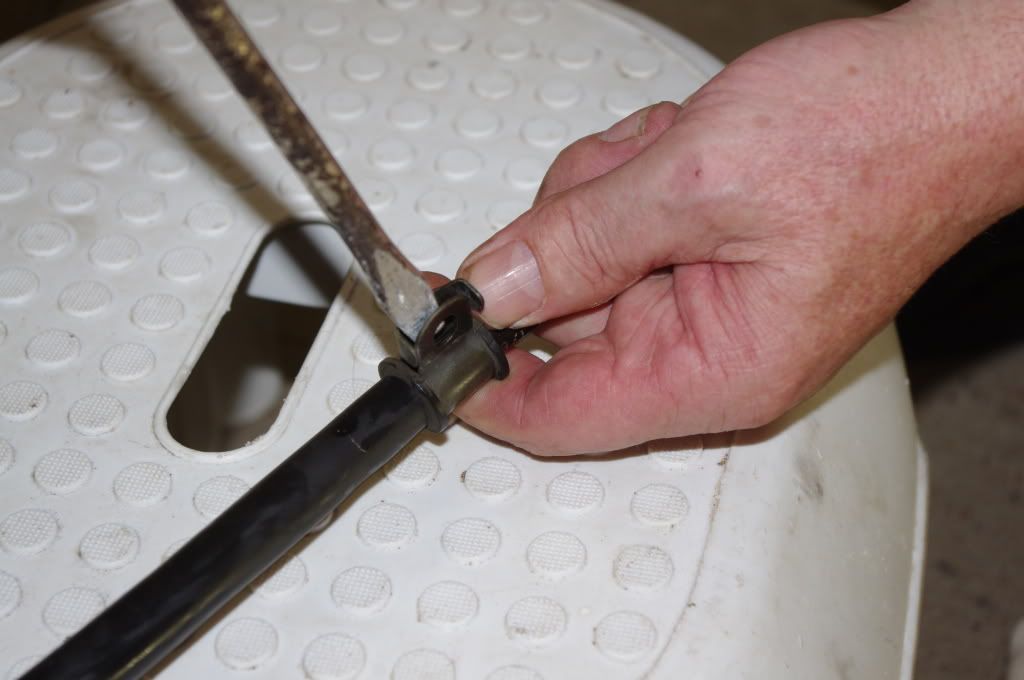
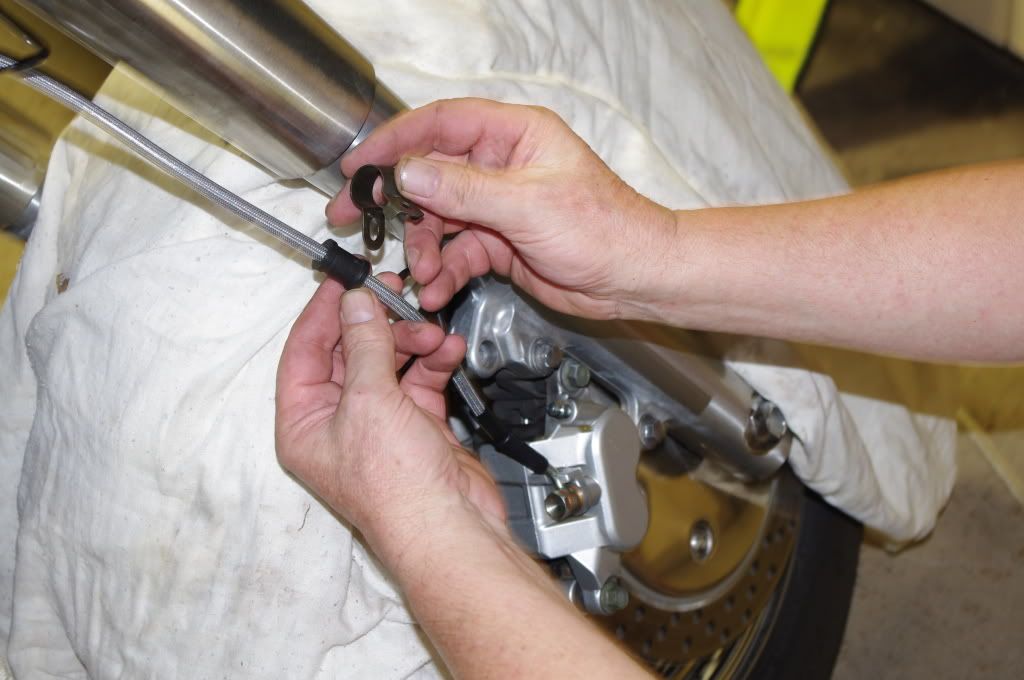
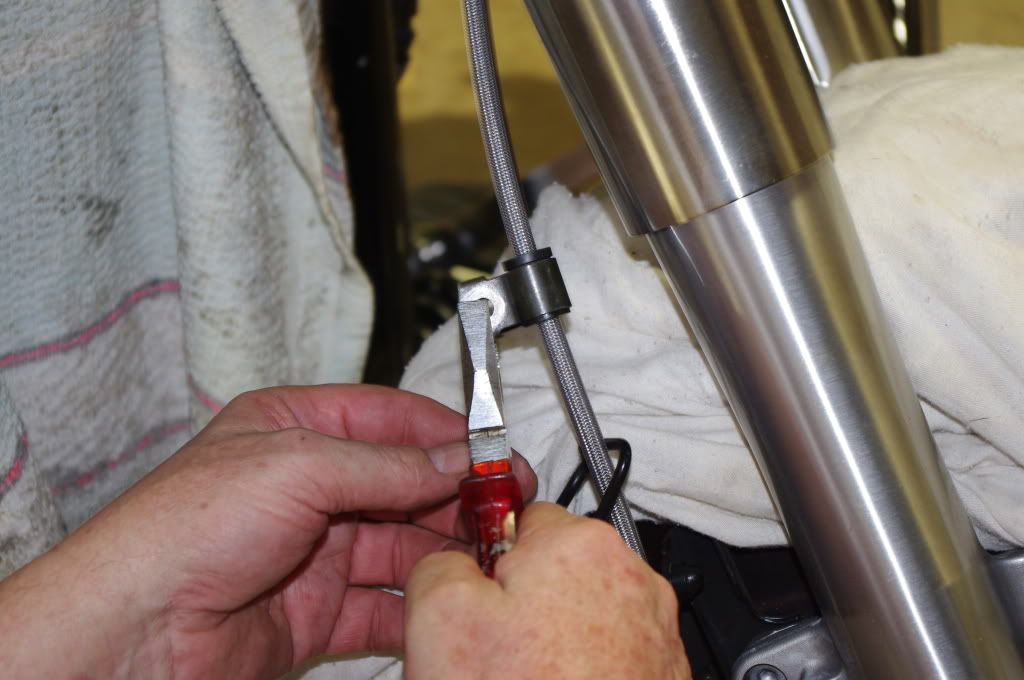
Remove the holding brackets from the old line by wedging a screw driver into the fold and open the clip. The rubbers for the holding bracket(s) on the braided line are loose unlike the factory fitted rubbers, which are fixed. The new rubbers can be slid up and down to the appropriate location. Locate onto the new braided line.
Add fresh brake fluid to the reservoir, loosen the bleed nipple and fit the clear hose. Gently squeeze the brake lever, when completely depressed. Place a finger over the non-attached end of the clear hose and gently let the brake lever out. Repeat until brake fluid appears and then tighten nipple. Keep an eye on the reservoir fluid level – braided line use less fluid, but it helps to make sure there’s enough fluid in the reservoir. Repeat on the other side if appropriate.
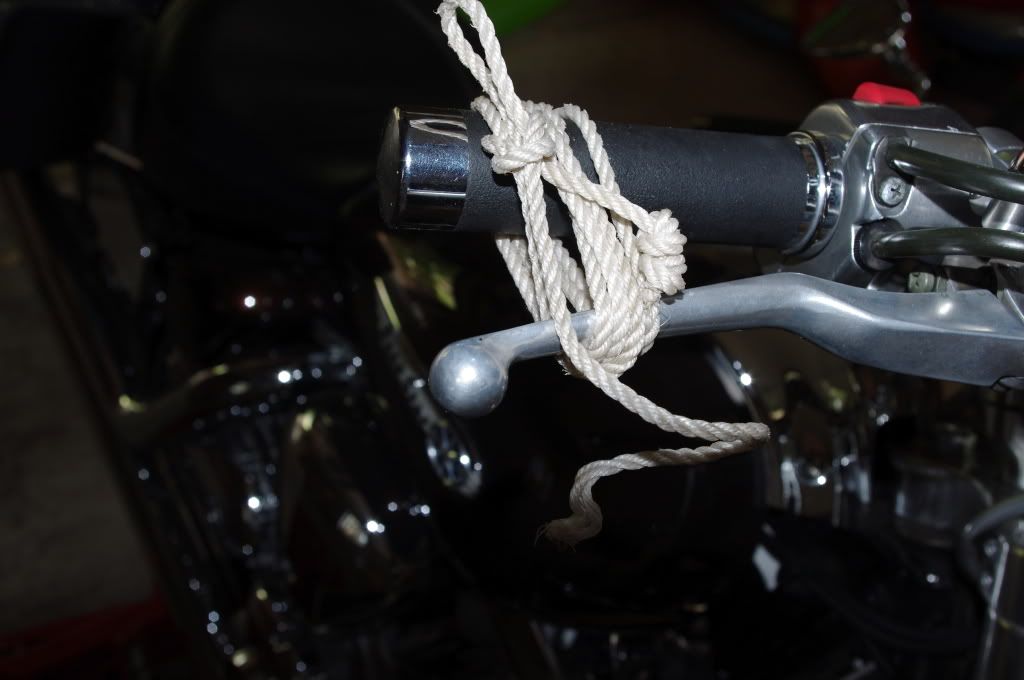
If your brake is still spongy – tie up the brake lever and leave for an hour. Normal brake feel will return.
Go for a gentle run on the bike – for the same effort, your stopping distances will have improved.
If you can change your own oil – there’s no reason why you can’t change your own brake fluid or install braided brake lines. Time taken, about one and a half hours.
One final word of warning - make sure you are using "Approved" braided lines. Some are not and may impact your insurance.
Changing the rear brake to a braided line is even simpler.
If you're after even more stopping power, fit scintered brake pads, or if you've got some extra pennies to spen, fit MetalWorks discs - I can highly recomend them
--------------------------------------------------------------------------------
Installing front braided lines + changing brake fluid
The cruiser is about 350kg wet – so I‘m after every bit of braking performance I can muster so on go the braided brake lines.
Cover your all your paintwork – brake fluid will strip your paint on contact so be warned.
Uncap the brake fluid reservoir. Check the bottom of the chamber for debris. If there is debris, syringe out the brake fluid and clean up the debris.

Open the bleeder valve on the caliper – my habit is to connect a clear 6mm plastic line to the nipple after just loosening the nipple and twist the plastic tube to open it further. Place the end in a jar and gently squeeze the brake handle if you haven’t had to empty it previously. This will eject the brake fluid from the line. I’ve got two callipers, so on the alternate side, its simply a matter of opening the bleeder, connecting the hose and let it drain by gravity.

Use a paper towel to mop any residual fluid in the reserve chamber.

Undo the bolt at the bottom of the upper line (12mm) at the forks bar; wrap it in a cloth so it doesn’t drip. Undo the banjo bolt at the reserve chamber and remove the line pulling it upwards. Measure this line against your new braided line to ensure it’s the correct length. Check the banjo angles, they may be different at each end and make sure you put the new banjos at the correct end.


Feed the new line down, and screw in the new banjo bolt finger tight making sure that (1) the old copper washer has been removed and (2) there are new copper washers either side of the new banjo. Feed the top of the new line through any guides and finger tighten the bolt on to the reserve chamber (copper washers as before). The new bolts will be 14 mm. Tighten both bolts appropriately. You should be able to feel the copper washers “collapse”.


Undo the banjo bolt on one side at the caliper (12mm) and the brake line holding bracket (10mm); keeping your waste jar handy just in case there is trapped fluid in the line. Once clear, undo the banjo bolt on the fork bar and then on the banjo bolt on the alternate side (if you have double calipers). Measure length against your new line.


Install the new banjo and banjo bolt to the caliper (copper washers as above) finger tight. Feed though any guides that the previous line was fed through and connect to new banjo and banjo bolt to the bracket on the fork bar. Feed to opposite side and repeat if there are two calipers. Tighten as above.


Remove the holding brackets from the old line by wedging a screw driver into the fold and open the clip. The rubbers for the holding bracket(s) on the braided line are loose unlike the factory fitted rubbers, which are fixed. The new rubbers can be slid up and down to the appropriate location. Locate onto the new braided line.


Add fresh brake fluid to the reservoir, loosen the bleed nipple and fit the clear hose. Gently squeeze the brake lever, when completely depressed. Place a finger over the non-attached end of the clear hose and gently let the brake lever out. Repeat until brake fluid appears and then tighten nipple. Keep an eye on the reservoir fluid level – braided line use less fluid, but it helps to make sure there’s enough fluid in the reservoir. Repeat on the other side if appropriate.

If your brake is still spongy – tie up the brake lever and leave for an hour. Normal brake feel will return.

Go for a gentle run on the bike – for the same effort, your stopping distances will have improved.
If you can change your own oil – there’s no reason why you can’t change your own brake fluid or install braided brake lines. Time taken, about one and a half hours.
One final word of warning - make sure you are using "Approved" braided lines. Some are not and may impact your insurance.
Changing the rear brake to a braided line is even simpler.
If you're after even more stopping power, fit scintered brake pads, or if you've got some extra pennies to spen, fit MetalWorks discs - I can highly recomend them